Friday, September 27, 2013

Amanda Lawrence - September DT share - Part 2

Well hi all! I'm back again this month with another layout to share with you all. Another boy themed layout, which is great cause we all know how hard it can be to find those perfect boy themed embellishments.

This Boy


My boy loves to know how things 'work' if he gets his hands on a screwdriver, nothing is safe! He just loves to pull things apart and has been doing it since he was just 18 months old. I began by working out where my photo would sit and then filled the area underneath it with strips of patterned paper and washi tape.


I added some paint splatters using some watercolours and a template. Then I coloured a selection of cogs using inks, watercolours and sharpie markers.


I also coloured some mini chevron with sharpie and added them to the title area.


Another close-up of the cogs shows how I gave my layout dimension by adding them both under and over the photo. I simply layered my photo on some scrap chipboard leaving some space around the edges. I was then able to tuck some of my elements under it. 

Memory Maze products used:

Other products used:
Bazzil cardstock, My Minds Eye & Cosmo Cricket papers, washi tape, ink, watercolour paint, sharpie markers, Doodlebug alphabet stickers, MoTEX labeller.

Thanks for stopping by and I'll see you back here in October!

Amanda x


Tuesday, September 24, 2013

September Happy Memories

Hi it's Susan here with another September post. I have a couple of layouts with lots of fablous chipboard to share with you today.
 
HAPPY MEMORIES

I found my inspiration for this layout from the "White With One" challenge were "the one" is pistashio. I used the double barbwire as a frame to look like branches and not as barb wire. This photo was taken in our two boy's cubby house which was on stumps and was surrounded by gum trees.

The swirl was sprayed with Perfect Pearls in Heirloom gold and dotted with dimensional pearls in lettuce.

The barbwire was sprayed with Perfect Pearls in heirloom gold and distress stickles in crushed olive was smudged along them. The banners were painted with dimensional pearls in lettuce. The camera was sprayed with perfect pearls and the lens was painted with smooch in green.
 
Memory Maze products used:
Mini camera(set) SO774
Swirl 4a SO419
Banner(set)
 
Other products used:
Tattered Angels mist-mustard seed, Basics Pearls-green, Bazzill Bling-white, Kaisercraft-doilleys, Flourish With A Bling-Jack-green, Smooch-green, Dimensional Pearls-lettuce, Perfect Pearls-heirloom gold, Distress Stickles-crushed olive.
....................................................................................
 
ALL GIRL
 
I made this layout for a challenge at "Scrap Around the World" and the inspiration board was black and white. I painted black gesso on the top and bottom and then used crackle paint over a mask.

I painted the lily with black gesso and dabbed the center with black glitter glue.

The swirls were painted with black gesso and dabbed with black glitter glue.
A simple but effective treatment for the chipboard.
 
Memory Maze products
Lilly 2209091
Small swirls
 
Other products used
Gesso, Glitter glue, Tim Holtz film strip, paper rose, Kaisercraft rubon-girls rule & elegant black pearl flourish & tissue tape, white card & velvet ribbon
 
That's it for September so Happy Scrapping


Wednesday, September 18, 2013

Tracey Campbell's Mid September Reveal

 Hello again everyone, welcome to my Mid September reveal. I have a four very different layouts to share with you today.

Navy, You & Me

 
After over ten years in the Defence Force I have many un-scrapped photos and seeing as I have finally found the perfect embellishments or titles to go along with those photo I will be doing a lot of Navy layouts.....I promise I won't share them all with you....I don't want to bore you all. :) Anyway my first layout that I have to share is one of the first photos that my husband and I have of us together. It was taken at my passing out parade when I finished my Officer training. Not sure if you can read all of the title it reads "Without the Navy there would be no You and Me" I wanted the layout to reflect that we meet while we were both serving.
Memory Maze Product used
Product ID:    LO219 Navy
 
 
*****************************

Hi


The polaroid and square Instagram photos are really "in" right now and  I have been wanting to do a layout using frames and when I got a packet of the Matt Board Square set I just knew how to use the smaller squares. These frames come with dimension already added and the texture of the material it is made out of is great for adding your own colour. In my "Hi" layout I have added washi tape stripes to one, misted another, painted and stamped on yet another and each one looks great. I have a heap of the large ones left so keep a look out on the blog and how I use them.
Memory Maze Product used
Product ID:    M0002 Matt Board Square Set
*****************************

Believe in the Magic Always

I wanted to add a bit of magic and whimsy to this layout so I created a water colour swirl with floating butterflies and confetti. To highlight the photo I used the chipboard scribble to surround the photo of Bronte with her balloons. I have been asked a few times now how I get my chipboard colours so vibrant ....well the answer is simple....I cover it with white gesso and then paint it a colour to match the rest of the elements in the layout. The gesso brings the chipboard back to a neutral colour so that other colours can be absorbed.  In this layout I only wanted a subtle colour so I used pastel colours.  
Memory Maze Product used
Product ID:    Z0044 Scribble
 
 *****************************

Perth


Just a fun layout to go along with some photo of my friends and I when we got off the ship HMAS KANIMBLA from our sea training cruise in Perth. We had a day spare to explore the city before flying back to HMAS CRESWELL for more training. Here we are in front of the bell tower down on the river front. I have used the chipboard chevrons and the arrows and painted them with acrylic paint then coated with Dimensional Magic to give them a glossy look.
 
Memory Maze Product used
Product ID: LO199 Arrows
Product ID:     SO768 Chevron
 
 *****************************
Thanks for stopping by, see you next month.
Hugs
Tracey

Sunday, September 15, 2013

Thank Heaven For little Girls: September Design Team Share

Hello it's Donna back with you today and I  am going to share a layout that I created of Ruby and with her daycare photo,  I love it to bits and thought it needed something a little special.  Its funny how you have one thing in your head in how you want to create a project and it turns out completely different.

...................................................................................................................................................................

Thank Heaven For Little Girls


I had this idea of popping Ruby in the middle of the nest and saying that our nest is full but I sort of lost the nest in the layers so had to think of something else lol.

I started but painting all my chipboard in white and then covered it in clear crackle paint.  Once that was completely dried I added distress stains to go into the cracks of the crackle.


Here you can see the leaves ,  don't they look pretty.


and the butterflies that have been coloured with purple distress and FWAB pearls.


I love this saying,  I have first covered it in white paint and then blue,  I wanted a bit of a distress look


you can see threw out the whole layout in the background parts of the nest.   I wish I had not covered it as much and when I tried to show a bit more  of it the glue had already set :-(

Another butterfly
  

The centre of the layout

PRODUCTS USED:

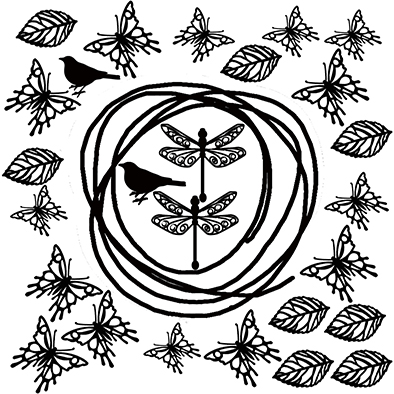
Lindas scribble with butterflies dragonflies and birds sold 3's


Memory Maze Chip Board Saying:  
Thank Heaven For Little Girls

I hope you enjoyed my share today,  feel free to share and leave a message, we love to see what you think.  Happy Scrappin Everyone xox Donna


Friday, September 13, 2013

Amanda Lawrence - September DT Share - Part 1

Hi all! I'm here with my first share for the month of September. Today I'm going to show you a layout where a framed out a series of photos using the pieces from the 12x12 Film Set. When I had my photos printed I used the mini print option which puts 4 x 2x3's on a single 4x6 photo sheet. 

Such a little Poser


My boy loves to play up for the camera, must be the child of a scrapbooker! 


The single film frames from the 12x12 sheet were great for these small mini prints. I like that I could use a series of shots but the frames make a feature of each. I simply stuck the frame over the photo and trimmed the excess from the top and bottom. The width was perfect! The chipboard was simply inked in black which really makes them pop against the background.


I also used a few stars from the 12x12 nested star sheet. It has a tonne of extra stars in the space around the edge and is really great value for money. You get so much out of the one sheet! I have covered them in washi tape, simply laying strips to cover and trimming off the excess with my craft knife.


I also used a arrow from the arrow set which I inked to match. To add a little texture to the page, I wrapped some twine around the arrow and tied it in a bow.

Memory Maze products used:

12x12 Film Set - Z0027
Arrows assorted - L0199
12x12 Stars Multipack - Z0007

Other products used:
Bazzil cardstock, Echo Park papers, AC Thickers, MoTEX label maker, washi tape, twine, D-lish Scraps flair badges, ink, staples.


Thanks for stopping by, I'll be back at the end of the month with some more creations to share. 
Till then, may all your days be creative ones.

Amanda x


Monday, September 9, 2013

September from Susan

Hi again from Susan. Here I have a layout for you with more of the wonderful chipboard pieces from Memory Maze Designs along with some instructions on how I made it.
 
HAPPILY
This layout is all about my husband and myself and it celebrates the fact that we have been married  for nearly 32 wonderful years!

The frame was primes with gesso then when dry it was coated with red acrylic paint.

Once the paint had dried I smudged the edges with dark grey ink to create a shadow around it. There is a close up in the photo below.


Next I stamped a swirling stamp pattern in clear ink over the painted frame and sprinkled on copper embossing powder then heated it. This allowed the red paint to show through the copper embossing. giving the frame smooth and rough textures.


For the swirls I coated them in gesso then when dry I used brown ink over the top as I didn"t want the white gesso showing through the glitter. I cover the chipboard with white gesso as it makes the colour stand out better.

The dry swirl was coated with dimensional magic/crystal glaze then I sprinkled copper glitter over the top and left it overnight to dry. The excess glitter was gently shaken off then a top coat of dimensional magice was applied and left to dry. This makes for a sparkly high gloss finish.

A few pearl drops were stuck around the swirl to dress it up a bit.

The love banner was simply inked and the word love coloured with Smoch ink then a couple of pearls were added for the final touch. This was then clustered together with a tag and flowers.
Even with all the waiting for embellishments to dry, this was a fun layout to make.
So gather up all your bits and pieces and have a go at findiing fun ways to alter your chipboard pieces.
 
MEMORY MAZE PIECES
Frame vow4
LOVE banner word so797
Corner flourish lo114
 
Other Materials
Kaisercraft-paper blooms, pearls, Simple Stories-Generations-Remember When, Dimensional Magic, Staz On ink-Timber Brown, copper embossing powder, white gesso, Smooch-green & molasses.


Friday, September 6, 2013

The possibilties are endless......

Hello everyone,  Donna here and its my time to share with you.  I thought I would do something a bit different this time and show you how you can use Memory Maze Chipboard as a stamp!  lots of fun and a great idea for doing something a little different.

Chipboard Stamp Tutorial


You will  need:
Chipboard pieces
Double sided sticky sheet
Double sided tape
Stamp block
VersaMark Stamp Pad
or other ink
scissors
and I have used embossing powders to (optional)


Select piece of chipboard you want to use and cut a piece of double sided stick sheet a little larger that the chipboard


Take off the backing


and apply to stamp block


take off the other backing


and place chipboard onto the sticky sheet, press hard to keep in place


and there you have your stamp :-)


If you do not have sticky back paper you can used double sided tape instead


pop a couple of strips down the center and pop chipboard piece on top.


Perfect, another stamp.  Its that simple!


Which my new tape I have inked it up with VersaMark, so I can emboss,  you can use normal ink.  Just remember that the chipboard is absorbent so you want to work fast and add plenty of ink if you are using normal ink.


Once inked up, press stamp down


I have applied a glitter embossing powder


End result.  I knew I was going to be cutting this out so I did not worry about lose bits of embossing powder around the outer edges.  If you do not want the lose bits before you stamp your image swipe a antistatic pad across your paper :-)

After I cut my image out I coloured it with distress inks


Finished embellishment, all ready for your next project.


memory Maze chip Board used for this tutorial :

Lily

. . . . . . . . . . . . . . . . . . . . . . . . . . . . . . . . . . . . . . . . . . . 

Skull Card

Here is a project using the tutorial above,  hope you enjoy and look forward to seeing your projects.


Card showing chipboard stamp


Close up of skulls,  I have embossed these skulls, used WOW foil and H2O paints for the detail


Memory Maze Chipboard used for this project :
Bulb/skull

Well that's All I have to share today,  hope you enjoyed and would love to see any projects made inspired by this tutorial,  just leave a link in the comments and I will come visit you.

Happy Scrappin everyone xox Donna